Using GitHub Desktop
Using GitHub Desktop
For those that want do more version control and collaboration, GitHub desktop is a good place to start.
Setup
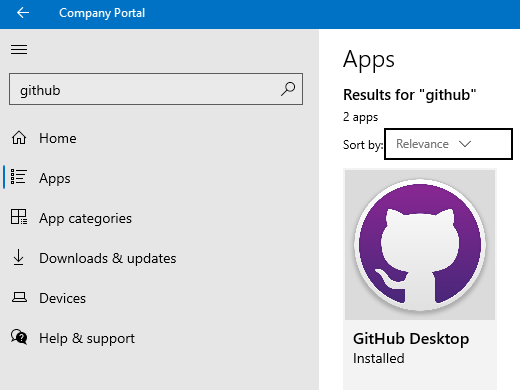
First step is to download GitHub Desktop from the company portal. If you open the company portal, you can search for GitHub. You want to download the app with the purple cat.
You will then need to open it up and you should be prompted to pop in your github username (you may need to validate this in the browser version- I can’t remember).
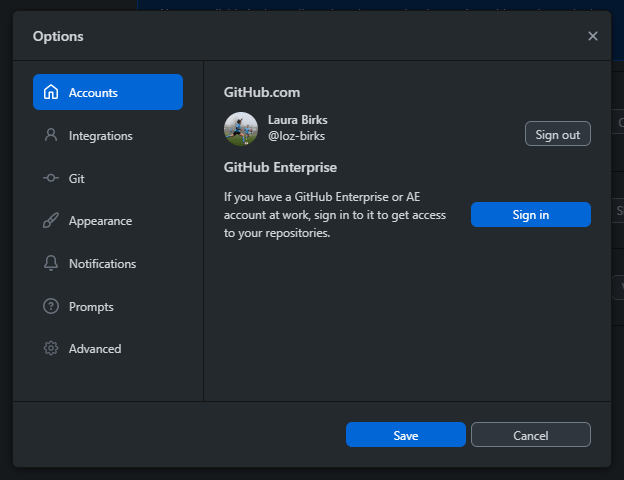
If you ever need to change your associated github account, you can navigate File > Options, and switch account in there.
Local repo management
Create a repo
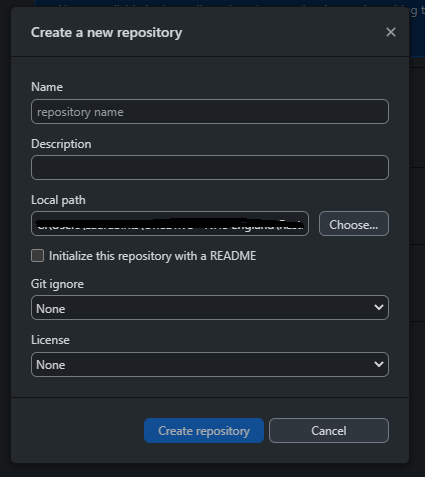
Even though it looks a little different, a lot of the process to create a repo in GitHub Desktop is similar to that of creating a repo in the browser, see here for a reminder. The main difference is that your repo will live locally until you choose to publish to GitHub, so no need to choose where it lives or privacy settings. You will, however need to choose which local file to put the repo folder- this will be where you save all your code.
.gitignore
What is it for?
Setting up a gitignore file is a bit more important when working from GitHub desktop than when simply uploading files to the browser version. By default, all the files in the repo folder will be included in the repo. However, there are likely to be some files or information that you don’t want to share. For example, this could be data or sensitive connection strings. The gitignore file tells the repo which files not to look at.
How do we set one up?
This file can be set up when you create the repo by selecting a specific gitignore template. This will ignore a determined list of filetypes which are commonly associated with the option you select. For example, if you select the R gitignore template, the file will include all R History, R Data, R User Data, etc. It can be a good starting point if you don’t know where to start.
How can I add new files to the gitignore?
Files can be added to the gitignore manually by right clicking on a file in the Changes section of GitHub desktop, and clicking Ignore file. You can choose whether to add the individual file or all files of the same filetype (this might be useful if you want to blanket ignore e.g. .csv files)
How can I make manual changes?
You can change your gitignore file as you go along by opening it as a text file, making your changes, and saving them. You can then commit changes to your gitignore file in the same way as you commit changes to any other file in the repo so that they are tracked.
Alternatively, you can update the gitignore by navigating to Repository > Repository settings > Ignored files and make changes there.
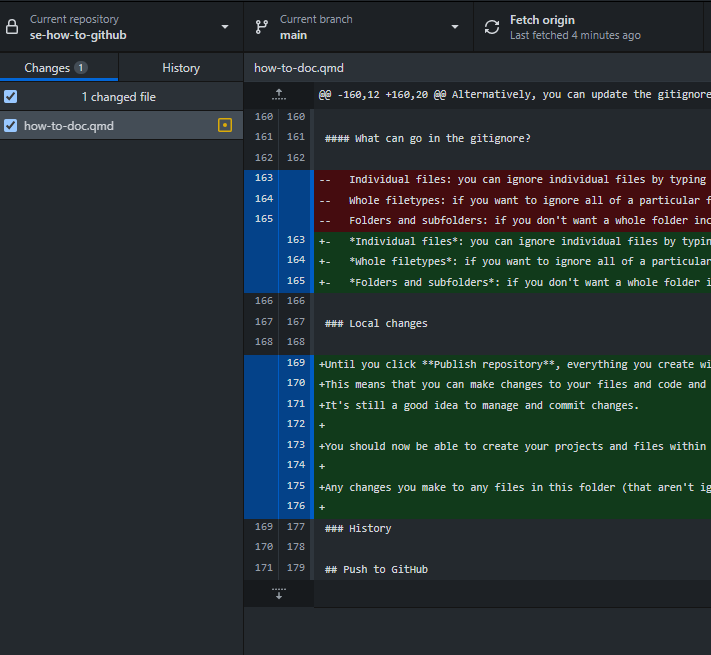
What can go in the gitignore?
- Individual files: you can ignore individual files by typing the filename
- Whole filetypes: if you want to ignore all of a particular filetype just prefix the filetype with an asterisk e.g. *.xlsx
- Folders and subfolders: if you don’t want a whole folder included, you can just name the folder path e.g. /data
Local changes
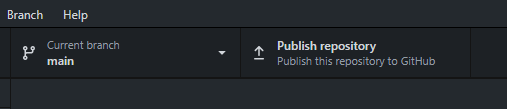
Until you click Publish repository, everything you create will live locally. This means that you can make changes to your files and code and play about endlessly until you’re happy to share more widely. It’s still a good idea to manage and commit changes.
You should now be able to create your projects and files within the repo folder (which lives wherever you decided when you set up the repo). You are then free to code / change files as you would normally within whichever programmes you use. All your saved changes will be tracked.
Any changes you save in any files in this folder (that aren’t ignored) will appear in the GitHub desktop changes section. You can see which file has changed, what has been removed (red), and what has been added (green). If you like the changes, ensure that the tick box is checked on the left of the file name, name your commit and add a description (optional), and click Commit to main.
A green square on the right of the file indicates a completely new file, orange indicates changes to an existing file, red indicates a deleted file.
You can make changes to multiple files in a single commit or commit them separately if you are likely to want to revisit multiple changes separately
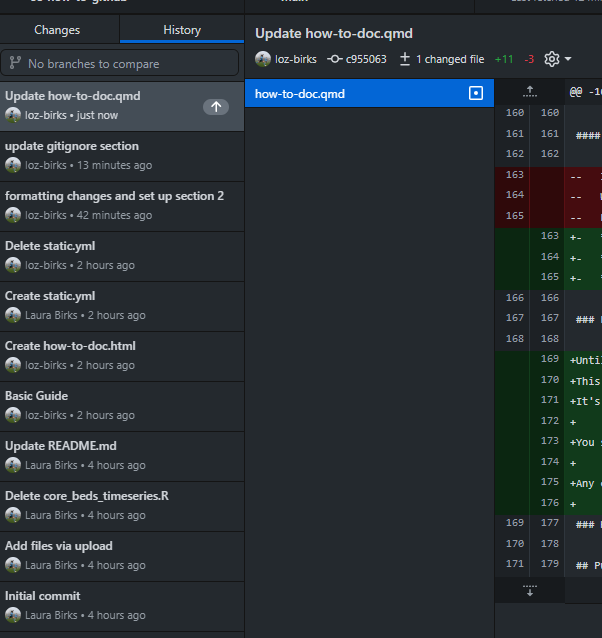
History
If you need to review or revisit any prior commits, you can see these in the History tab.
Push to GitHub
All that’s left to do is share your repo to github. This is as easy as clicking the Publish repository button.
Remember to select the organisation if you want to share with colleagues. If you publish to your private area, you can transfer to the organisation but you will lose admin rights so won’t be able to make changes or move to the South East area!
You can also pull any changes from github down to your local machine by clicking Pull origin in the top bar
Open a GitHub repo
As well as creating your own repos, it may be that you want to open someone else’s that you’ve seen on GitHub. There are 2 easy ways to do this:
- From the browser
- From the desktop app
From the Browser
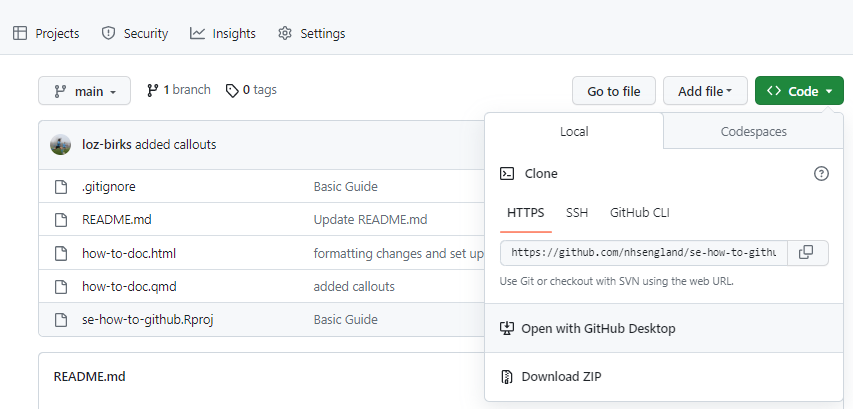
This is really easy. Navigate to the repo you want to work on. Click the green <> Code button, and then Open with GitHub Desktop. Easy.
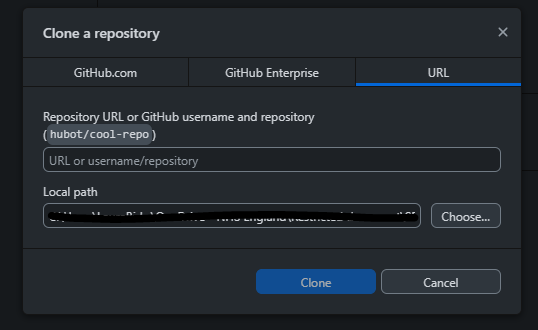
From GitHub Desktop
This is almost as easy. Within GitHub desktop, navigate to File > Clone Repository and paste in either the URL of the repo in question, or type in the github username and repo name. The only other thing you need to do is tell GitHub desktop where you want the repo folder to live on your machine.