Publishing Your First Repo
GitHub for South East D&A
Our ambition in South East D&A is to share as much code as possible on GitHub, to maximise sharing with others as well as to help ourselves out in future. There are lots of things that this document does not cover but this is a very basic guide to publishing your first repo and hopefully we can make it less scary!

Preliminary Steps
Before we start, we need to check the following:
- You have a GitHub account (with 2FA)
- You have been added to the NHS England Organisation
- You have been added to the South East D&A Team
Get a GitHub account
This is super simple- go to GitHub (https://github.com/) and click Sign Up:

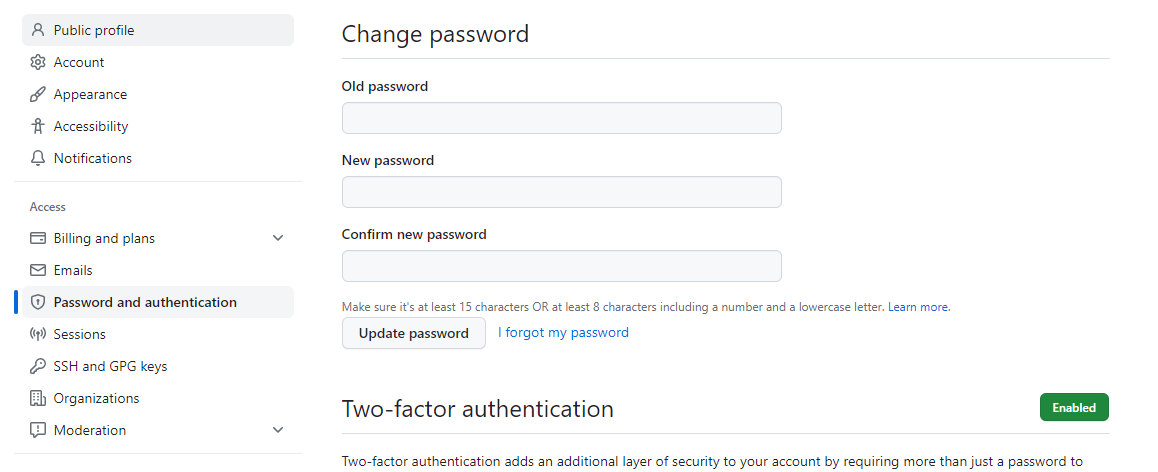
Then you need to enable two factor authentication. Once logged in, go to Settings > Password and authentication, and, in the section called Two-factor authentication, click Enable and follow the instructions. You can use the same app that you authenticate other access with.
Get added to the NHS England Organisation and SE D&A area
Once you have a GitHub account and are set up with 2FA, you can email the organisational GitHub Management inbox at github@england.nhs.uk, requesting to be added to the NHS England Organisation and then one of our local admins can add you to the South East D&A area.
Important note: the permissions set up means that creating a repo in your personal area and moving it to the organisation area will result in you losing all admin permissions (e.g. to add users / move to the team area). So make sure you are putting repos in the right place!!
That’s it, we’re ready to share some code!
Sharing code via the browser
This section covers very basic code sharing via the browser. It does not utilise many of the features of Git or GitHub but is a good first step for creating a library of code we can return to.
Create the repo
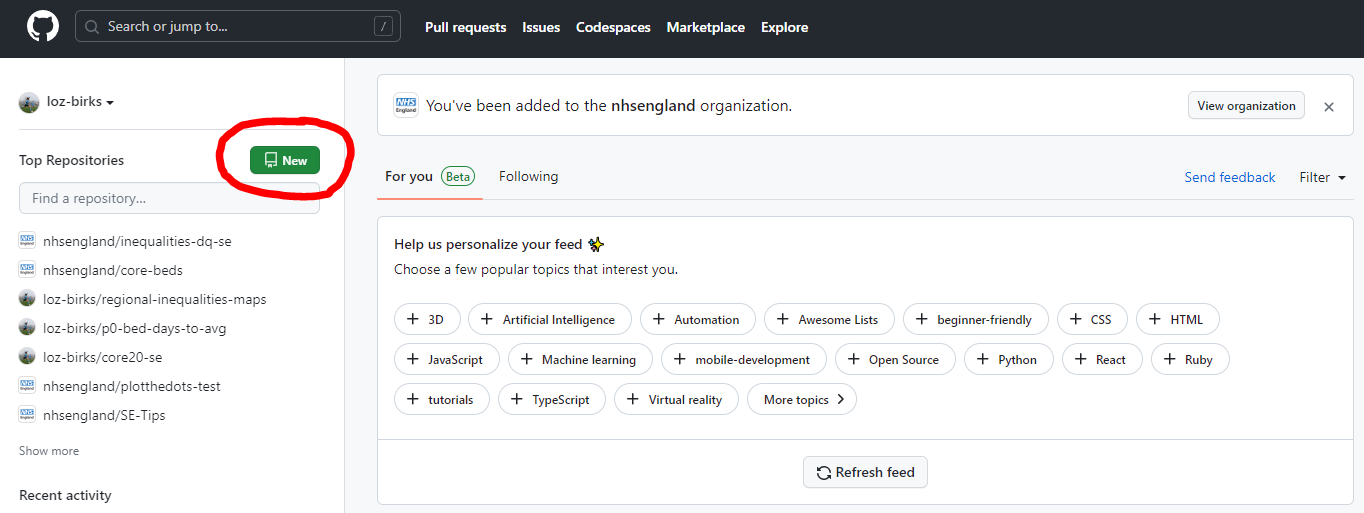
When we first log in to GitHub, our homepage will look something like this. To create a repo, click the green New button in the left hand Top Repositories section.
We will also find this button in the Repositories sections on our profile and within any organisations that we are part of. They all lead to the same place. Which is here:
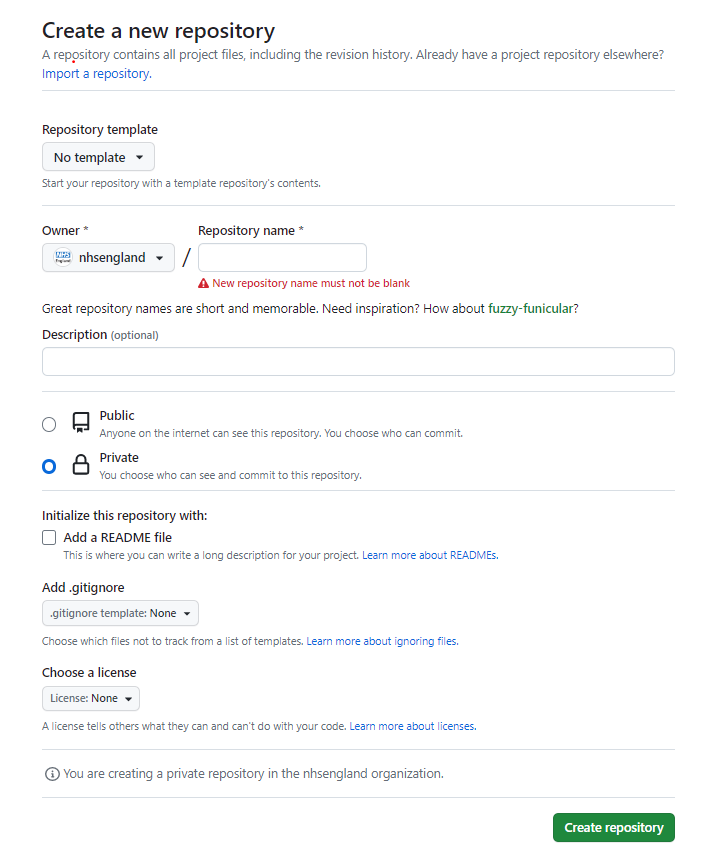
As you can see, there are several things that need filling, and some that don’t. We take them from the top:
Repository template- There is a se-template team template you can choose to use. It will initialise a repo with a gitignore, SOP folder and template, and README template with some key reporting info for you to easily edit. If you don’t want to use this template, feel free to leave this as No template.
Owner- Depending on where you were when you clicked the New Repository button, this will default to either your own account or one of your organisations. It’s up to you where you store your repos but, generally, you would want to put work that you intend to share with colleagues within the organisation and keep only personal things in your own area.
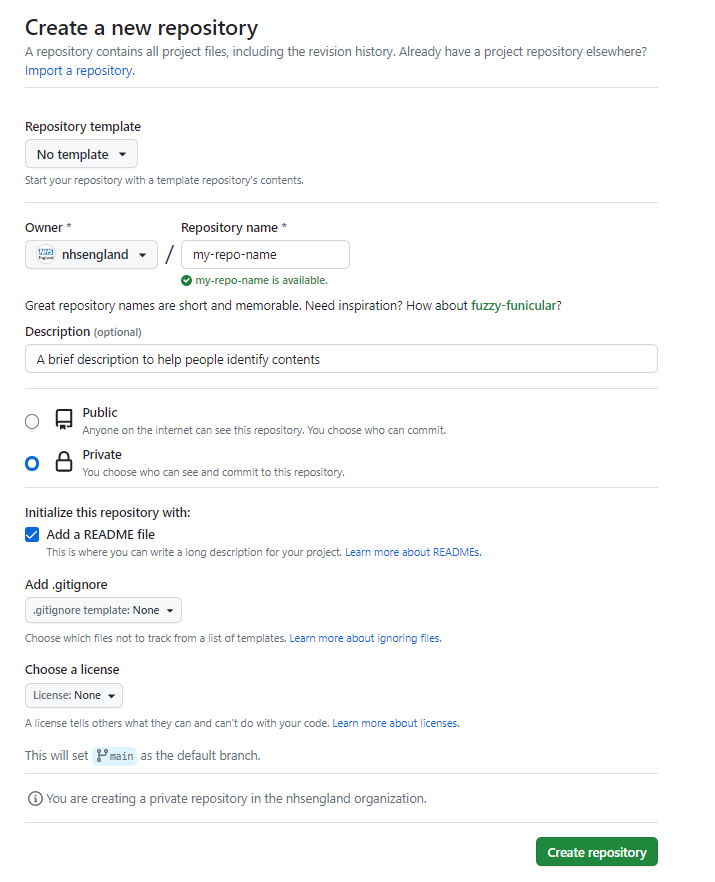
Repository name- This should be a unique name that is short but reasonably descriptive. GitHub will handily tell you if the name is already in use somewhere else. Repo names shouldn’t include spaces but don’t worry if you forget, GitHub will replace spaces with hyphens.
Description- Although this field is optional, it’s a good idea to put something in here to help you (and others) quickly identify what the code is.
Public / Private- If you select Public then anyone anywhere can see your repo and the code within it. Selecting Private means that only those within the organisation (if the owner is an organisation) can see the code. Generally, this should be the default option- you can always change the privacy later.
Add a README file- Again, this is optional but generally a good idea. It will automatically create a markdown file with the repo name as the title and the description as the contents. You can then add details about the project including inputs, outputs, purpose, methodology etc. which will help you and others trying to use your code later.
Add .gitignore- A gitignore file tells GitHub which files to not look at and not publish. This could be things like data or personal user keys that you don’t want to share. We will use these more when we look at using GitHub Desktop but it is less important if you just plan to upload files manually.
Choose a license- This just tells people what they can do with their code. You can leave this as None if you want or, if you’re happy for people to use and replicate your code as they please, you might choose the MIT License.
Now you can click Create repository.
Move the repo to the team area
If you have created your repo in the organisational area, you might want to move it to live in the South East area. This is very simple.
- Navigate to the repo and click the Settings button

- Within the Access section, click Collaborators and teams (top left), and click Add teams
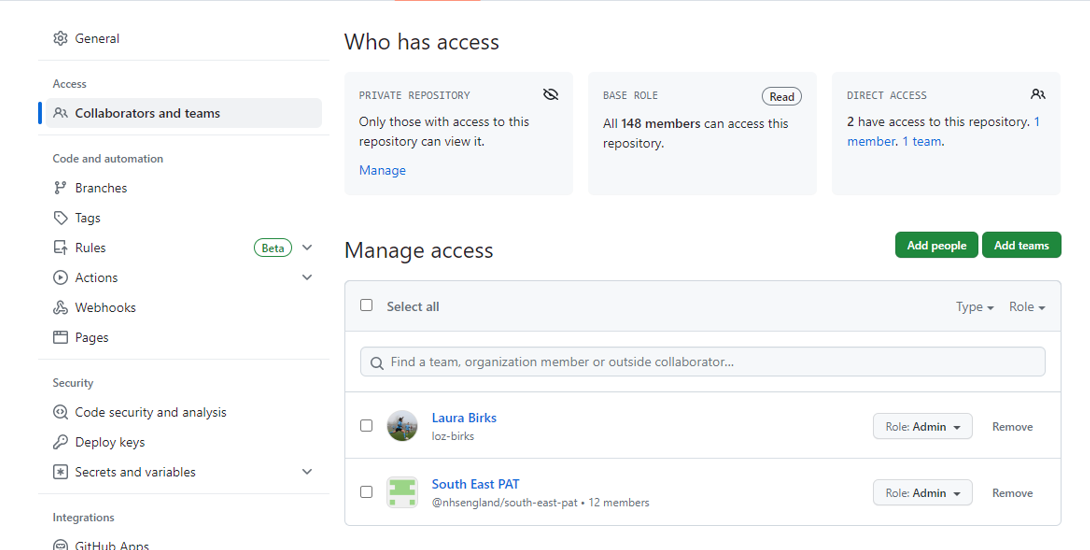
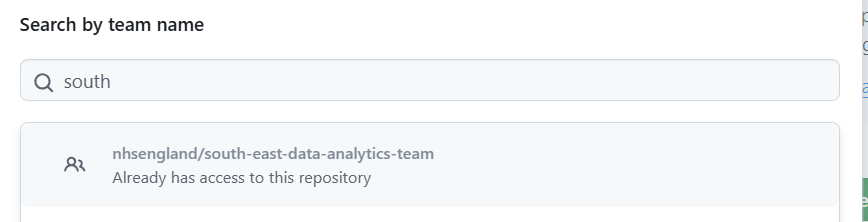
- Finally search for and select South East D&A
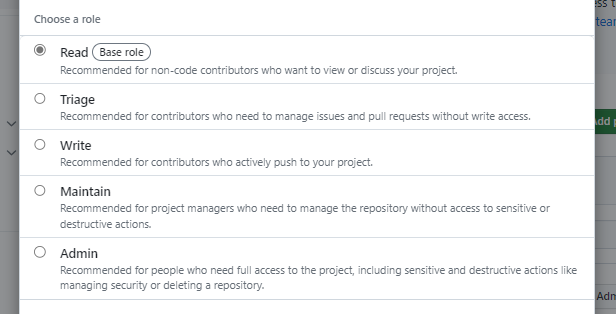
- Choose what role you want your team members to have
Your repo now lives in the South East D&A section of the organisation. This should make it easier to find and will allow your team colleagues to make changes if you’ve allowed them to!
Please also add the nhsengland everyone team to the repo and give them read access so that everyone in the organisation can see your code.
Add files to the repo
Finally, all you need to do is actually upload some files!
- Navigate to your repo and click Add file and then Upload files

- Drag and drop or browse to your files
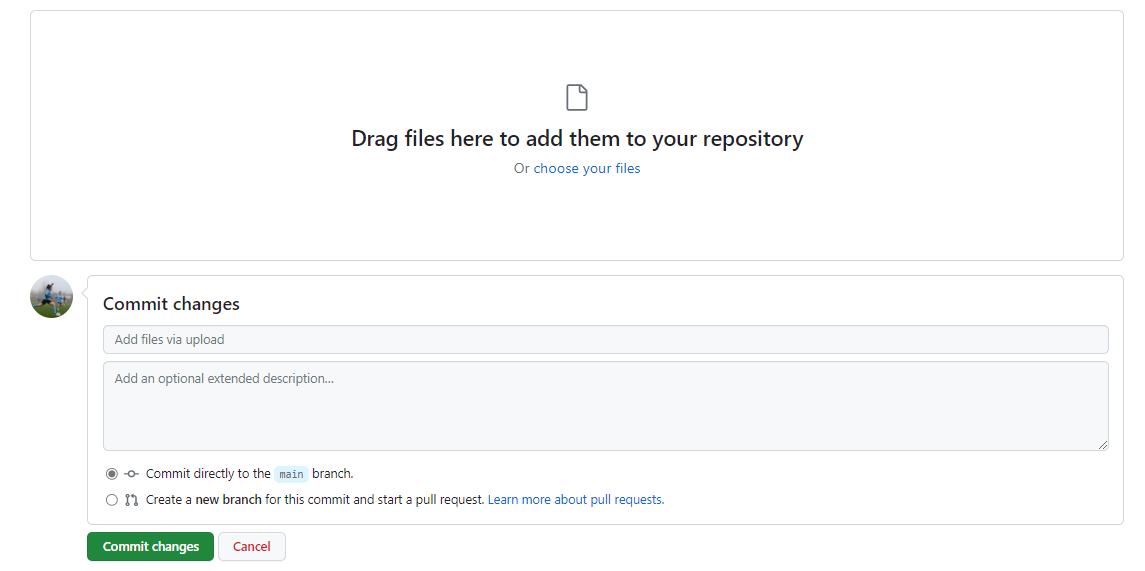
- Name your commit, so you know what you added when, and click ✨Commit changes✨

Hints / tips / notes / things that don’t particularly belong anywhere in particular
We do not have the power to delete repos from the NHS England organisation. If you need to have something deleted, you will need to contact the central inbox at github@england.nhs.uk.